DALI ⋅ VEGA ⋅ Product manual ⋅ English ⋅ 🇬🇧
1. Introduction
Congratulations on your new DALI VEGA. The DALI VEGA is a state-of-the-art, all-in-one sound system designed to be the performance benchmark for stylish single-box music in the home. DALI VEGA combines fabulous sound quality with immense versatility, intuitive ease of use, and a uniquely engaging Danish luxury design.
This user manual describes the setup and operation of the DALI VEGA.
You should read the manual before you start setting up and using your DALI VEGA.
The manual begins with a description of the contents of the DALI VEGA box and continues to cover DALI VEGA positioning, connections, configuration, and day-to-day use.
2. Pack contents
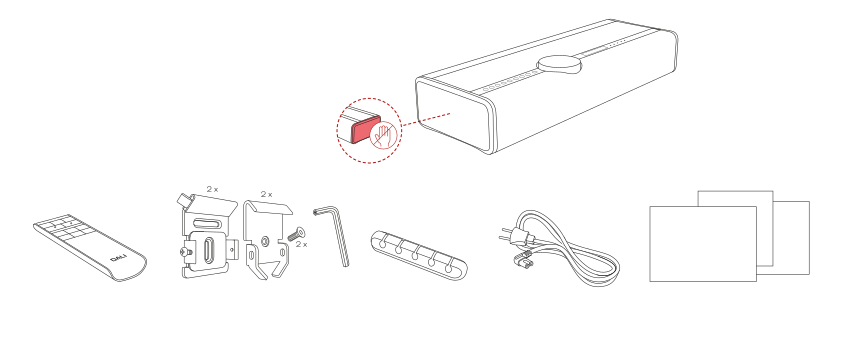
Avoid touching the passive radiator drivers at both ends of the DALI VEGA.
- 1 × Remote control
- 2 × AAA batteries (for the remote control)
- 2 × Wall brackets (Wall)
- 2 × Wall brackets (VEGA)
- 2 × Screws for DALI VEGA wall brackets
- 1 × M6 Allen key
- 1 × Cable holder
- 1 × Mains cable
- 1 × Product registration card
- 1 × Quick start guide
- 2 × Wall mounting template
- 1 × Safety manual
3. Unpacking
IMPORTANT!
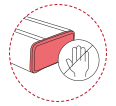
While unpacking, make sure not to touch the passive radiators.
- Open the box lid, and use both straps to lift the DALI VEGA out of the box.
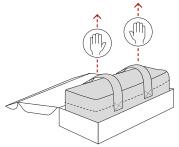
- Release the Velcro straps and remove the cover.
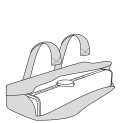
- Tilt the DALI VEGA 90 degrees to its rear-facing side.
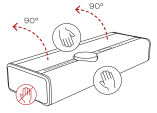
Open and remove the cable clip.
Plug in the power cable and any additional cables.
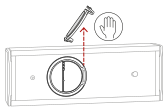
- Attach the cable clip, then flip the DALI VEGA back onto its feet.
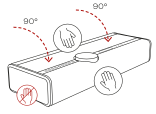
VEGA is now ready for Wi-Fi connection.
4. Wi-Fi connection & BluOS setup
Power on your DALI VEGA
Wait for the BluOS LED to turn solid green, indicating “Hotspot” mode.
Get the BluOS app
Using your smartphone or tablet, download and open the BluOS app.
Add your DALI VEGA to your network
The “Add a player” wizard will guide you through the steps to complete your BluOS setup.
Go to bluesound.com/downloads to download the app.
The initial network setup is done using the BluOS app on your smartphone or tablet. Make sure you have the App downloaded and installed, and your smartphone or tablet nearby as you get started.
If you are using an iOS device, the DALI VEGA can also be connected to your Wi-Fi network via the “Set up new AirPlay speaker” option in your iOS Wi-Fi settings.
If the LAN (network) socket of your DALI VEGA is connected to a home router or network switch, it will not require a Wi-Fi connection. Your DALI VEGA will become available for setup within the BluOS Controller app.
5. Positioning your DALI VEGA
The DALI VEGA offers excellent versatility, making it suitable for installation in a wide variety of home locations. It can be placed on a table, a furniture unit, a shelf, or a window ledge, for example. And the DALI VEGA can also be wall-mounted in either landscape or portrait orientation using the DALI VEGA wall bracket. In terms of positioning your DALI VEGA, the only requirements are access to mains power and a network router or switch, if you prefer a wired network connection.
Depending on the orientation of your DALI VEGA, it will automatically adapt the stereo routing to its front and rear loudspeakers, as appropriate, to accommodate standing, landscape, or portrait orientation. Its display orientation will also rotate automatically.
Free placement
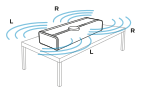
DALI VEGA plays in both directions: front and back.
Recommended setting for Rear Wall Distance parameter: Free.
Placement near wall
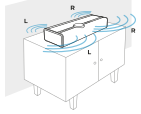
DALI VEGA plays more forwards than backwards.
Recommended setting for Rear Wall Distance parameter: Medium
Placement close to corner/wall
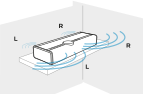
DALI VEGA plays even less backwards in this mode.
Recommended setting for Rear Wall Distance parameter: Short.
Wall mount in landscape format
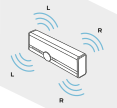
DALI VEGA plays in both directions.
Rear Wall Distance parameter is automatically set.
Wall mount in portrait format
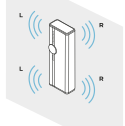
DALI VEGA plays in both directions.
The front drivers play the left channel, and the rear drivers play the right channel.
Rear Wall Distance parameter is automatically set.
Adaptive Orientation Adjustment
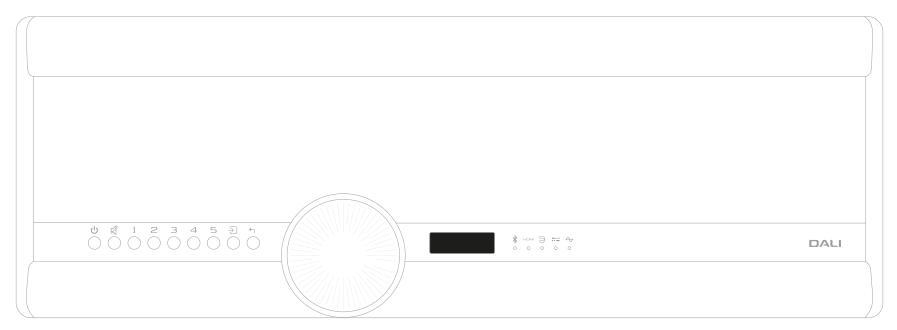
The DALI VEGA is engineered with advanced Adaptive Orientation Adjustment technology developed in-house by DALI’s engineers. Adaptive Orientation Adjustment enables seamless integration of your DALI VEGA into any living space, no matter how you place or mount it.
Equipped with an internal accelerometer, the DALI VEGA intelligently detects its mounting orientation – whether it’s standing on a shelf or table, or wall-mounted in landscape or portrait mode. And it automatically reconfigures stereo channel mapping to ensure optimal audio fidelity. This real-time adjustment enhances spatial accuracy and stereo imaging, delivering a consistently immersive listening experience regardless of placement.
Adaptive Orientation Adjustment is a key component of the DALI VEGA’s environment-aware design philosophy, allowing it to adapt acoustically to its user preferences and elevate musical performance with precision and clarity.
When you place your DALI VEGA in the desired orientation, the DALI VEGA display will indicate the activated Adaptive Orientation Adjustment mode by showing one of the three logos.
6. Cable management
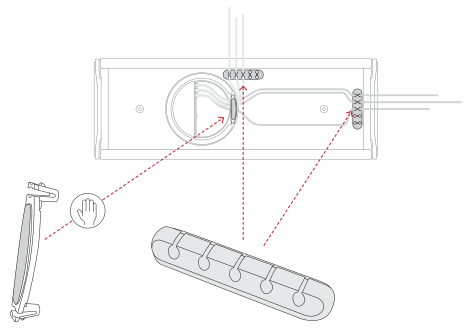
On the back of the DALI VEGA, you will find a cable clip, which can be opened using your fingers at both ends. Together with the supplied cable holder, this feature allows for easy cable management in any orientation or placement.
7. Wall-mounting your DALI VEGA
To mount the DALI VEGA on the wall in either landscape or portrait mode, use the four included wall brackets.
Two of the wall brackets are mounted with the included wall bracket screws on the back of the DALI VEGA using the M6 Allen key.
The two remaining wall brackets are mounted on the wall with four appropriate screws (not included).
While mounting, make sure not to touch the passive radiators.
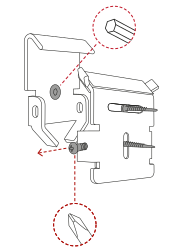
The brackets for DALI VEGA are mounted with one bracket screw each (included).
Use an M6 Allen key and fasten the brackets securely in place.
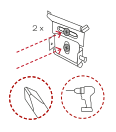
The brackets for the wall are mounted with two screws, appropriate for the wall type (not included).
Use the included wall-mounting templates to effortlessly determine the mounting placement of your wall brackets.
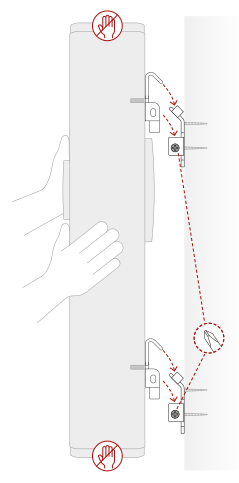
Before mounting the speaker, loosen the safety screw/screws with a Phillips screwdriver (not included).
Two wall-mounting templates are included: one for landscape orientation and one for portrait orientation.
Landscape orientation
- Use the included landscape wall-mounting template to mark the 2 x 2 drilling holes, then mount the two wall brackets on the wall.
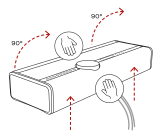
- Tilt the DALI VEGA 90 degrees to its rear-facing side.
Do NOT place the DALI VEGA on its front- or top-facing side, as this can accidentally scratch the volume wheel.
- Mount the DALI VEGA wall brackets for landscape orientation.
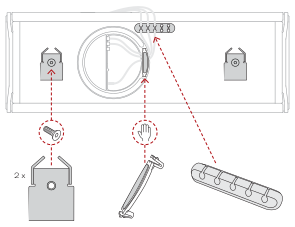
Place the self-adhesive cable holder and guide the cables through.
Remove the cable clip, connect your cables, and re-attach the cable clip.
Flip the DALI VEGA back on its feet.
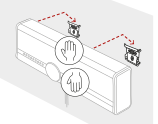
- Lift the DALI VEGA and turn its underside (and wall brackets) towards the wall.
- Carefully lift the DALI VEGA into place and attach it to the brackets.
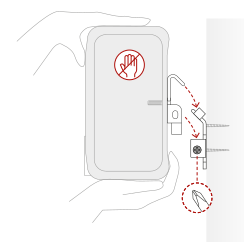
- Tighten the safety screws using a Phillips screwdriver.
7. Wall-mounting your DALI VEGA
Portrait orientation
Use the included portrait wall-mounting template to mark the 2 x 2 drilling holes, then mount the two wall brackets on the wall.
Tilt the DALI VEGA 90 degrees to its rear-facing side.
- Remove the cable clip, connect your cables, and re-attach the cable clip.
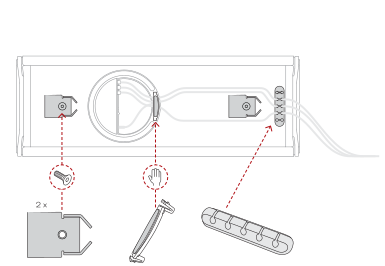
Place the self-adhesive cable holder and guide the cables through.
Mount the DALI VEGA wall brackets for portrait orientation.
Flip the DALI VEGA back on its feet.
- Lift up the DALI VEGA, turn its underside (and wall brackets) towards the wall, and rotate it clockwise into portrait orientation.
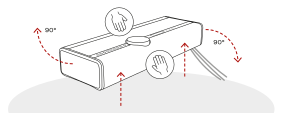
- Carefully lift the DALI VEGA into place and attach it to the brackets.
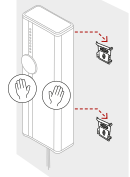
- Tighten the safety screws using a Phillips screwdriver.
8. Wired connections
The DALI VEGA provides a wide variety of connection options for integration into your home audio system.
Wired connection sockets are located in the connection panel and include the following options:
Subwoofer Output
A single RCA Phono socket allows you to connect an external subwoofer to enhance the bass performance of your DALI VEGA. The subwoofer output signal is mono and low-pass filtered to 120 Hz.
Analogue Input
A stereo pair of RCA Phono sockets enables the connection of an external audio source with line-level outputs. This might be a CD player or turntable with built-in RIAA, for example.
Optical Input
A TOSLINK optical digital audio socket enables the connection of an external audio source with an optical digital output. This might be a TV or a CD player, for example.
HDMI ARC
If you have a TV set with an HDMI ARC (Audio Return Channel) connector, connect it to the HDMI ARC connector of your DALI VEGA. You may also need to select external speakers for audio playback and enable CEC (Consumer Electronics Control) in your TV’s settings menu. The TV audio output format should be set to “PCM” or “Stereo”.
Using HDMI and CEC, you can use your TV remote to control the Volume, Mute, and Standby functions of your DALI VEGA.
If your TV does not support HDMI ARC, or if you are experiencing HDMI compatibility issues, DALI recommends using an optical connection from the TV’s optical audio output to your DALI VEGA.
In this scenario, you can still use the HDMI connection to control the DALI VEGA via CEC using your TV remote control.
To use your TV remote to control basic DALI VEGA functions (volume, mute, power on/off) via HDMI, HDMI CEC must be enabled on your TV.
HDMI CEC has different names depending on the TV brand:
- Samsung: Anynet+
- LG: SimpLink
- Sony: Bravia Sync
- Phillips: EasyLink
- Panasonic: Viera Link
- Hitachi: HDMI-CEC
USB Audio / Service
The DALI VEGA USB socket has two functions. Firstly, it enables music files stored on USB storage media, such as hard drives and pen drives, to be played by the DALI VEGA and made accessible via BluOS over the home network to which the DALI VEGA is connected. Secondly, the DALI VEGA USB socket enables software updates and service functions.
Power / Standby LED: The Power/Standby LED indicates the power state of the DALI VEGA.
LAN (Network): The DALI VEGA network socket provides the music streaming features of the BluOS app via a wired network connection. If your DALI VEGA is to use a wired network connection, connect the network socket to a home network router or switch using a standard network cable.
Power: Connect your DALI VEGA to mains power using the supplied mains cable.
9. DALI VEGA configuration
With your DALI VEGA positioned and connected to mains power, your wireless network, and the required wired sources, you can begin configuration.
The DALI VEGA is configured using the menu display. Use the volume wheel to select menu options. Tap the surface of the volume wheel to confirm selections. Use the Back/Exit button to the left of the volume wheel to save selected options and simultaneously step back through the setup menus.
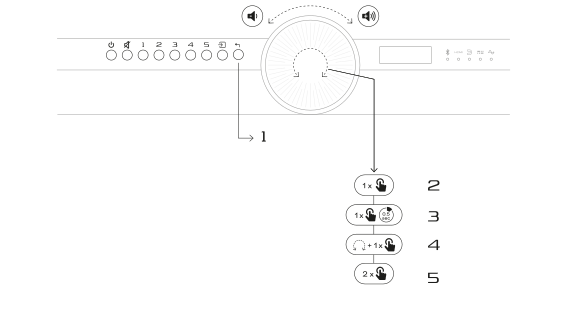
- Back/Exit
- Wake up display
- Menu
- Select
- Back/Exit
DALI VEGA Menus
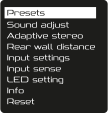
To access the DALI VEGA configuration menus, tap and hold the centre of the volume wheel once. The top level of the configuration menus will show in the display. Turn the volume wheel to scroll up and down the menu and tap the centre of the volume wheel again to select a menu option and enter its sub-menu.
The configuration options available under each top-level menu item are described in the following paragraphs.
If no selection is made in a menu within 10 seconds, the DALI VEGA display will revert to the opening screen.
Presets
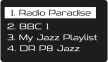
The Presets menu displays and enables activation of the presets made in the BluOS app. A total of 10 BluOS presets can be assigned (via the BluOS app) to the five Preset buttons to the left of the volume wheel.
Presets 1 to 10
The Preset buttons enable immediate selection of any stored items, such as radio stations or streaming services.
A single press activates presets 1 to 5.
A double press activates presets 6 to 10.
Any additional saved BluOS presets can be found in the Presets menu, where up to 40 presets can be activated. You can assign any currently selected source — such as an internet radio station or streaming service — to one of the Preset buttons for quick recall.
Sound adjust menu
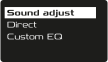
The Sound adjust menu allows selecting Direct audio (default DALI VEGA sound) or Custom EQ (equalisation).
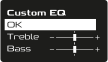
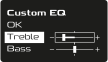
If the Custom EQ option is selected, a display offers bass and treble adjustment, +/-10 dB, in 2 dB steps. Adjust the bass and treble using the volume wheel.
DALI Adaptive Stereo Enhancement™

The DALI VEGA incorporates DALI-developed Adaptive Stereo Enhancement (ASE) technology that can enhance the stereo experience from compact speakers by making the sound more expansive, immersive, and engaging. DALI Adaptive Stereo Enhancement is enabled by default but can be disabled if preferred.
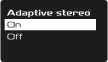
The Adaptive stereo menu lets you enable or disable Adaptive Stereo Enhancement. Select the required option using the volume wheel.
When Adaptive Stereo Enhancement is activated, it will be indicated with the ASE logo on the bottom left of the main display.
Rear wall distance menu
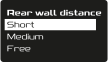
The sound of your DALI VEGA, like any loudspeaker, is affected by the presence of nearby room boundaries. The Rear wall distance menu allows adjustment of the DALI VEGA sound based on its distance from a wall.
Use the volume wheel to select the option that best matches the distance of your DALI VEGA from the rear.
- Short setting
-
Less than 10 cm (3.9 inches) rear wall distance
- Medium setting
-
10 - 50 cm (3.9 - 19.6 inches) rear wall distance
- Free setting
-
More than 50 cm (19.6 inches) rear wall distance
The Rear wall distance menu is disabled when the DALI VEGA is wall-mounted.
Input settings menu
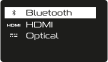
The Input settings menu enables configuration of options specific to the Bluetooth, HDMI, and Optical inputs.
The options are:
- Bluetooth
-
Release connection and Clear pairings.
- HDMI
-
Audio delay
- Optical
-
Signal detect and Carrier detect.
HDMI audio delay enables TV lip sync to be optimised.
Optical input signal detect and carrier detect enable the DALI VEGA automatically to select its optical input when either the optical source is simply switched on, or only when an audio signal is present.
Input sense menu
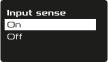
The Input sense menu enables DALI VEGA to switch on from Standby as soon as a signal is present on any input and automatically shut down after 20 minutes if no input signal is present. Input sense can be enabled or disabled. Use the volume wheel to select the required option.
Analogue and optical inputs are automatically selected when an audio signal is detected, provided input sense is enabled (On) and your DALI VEGA is not currently playing.
The Bluetooth and BluOS inputs will automatically be selected when the source Play button is pressed.
The HDMI ARC input will automatically be selected when a connected TV is switched on and if the DALI VEGA is not currently playing.
LED setting menu
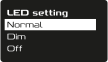
The LED setting menu enables the brightness of the DALI VEGA indicator LEDs to be adjusted. Use the volume wheel to select the required option.
If the LED setting menu is set to Off, the DALI VEGA LEDs are always off, and the current source selection is shown in the bottom-right corner of the display.
Info menu
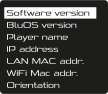
The Info menu displays system information that may be of use for troubleshooting. Use the volume wheel to select and view the required information and exit the menu using the Back/Exit button.
Reset menu
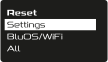
The Reset menu allows you to delete your DALI VEGA user settings.
Use the volume wheel to select the required option and exit the menu using the Back/Exit button.
The Settings option resets all user settings, including Bluetooth pairings, but excluding BluOS presets and Wi-Fi setup.
The BluOS/Wi-Fi option deletes saved BluOS presets and resets the Wi-Fi connection, returning the DALI VEGA to BluOS Hotspot Mode, ready for a new Wi-Fi connection.
The All option combines the two other reset options.
10. Your DALI VEGA in use
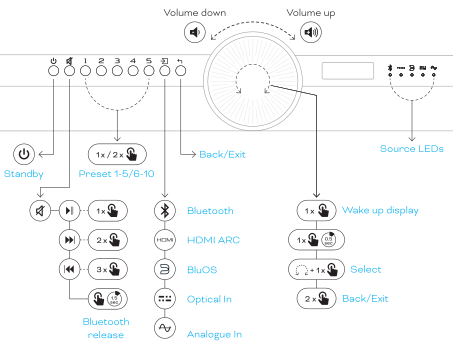
With your DALI VEGA positioned, connected and configured, it’s time to enjoy its performance with your favourite music.
To control your DALI VEGA, you can use either its on-body Buttons and volume wheel or its remote control. The remote control and its buttons are illustrated in the next section.
The DALI VEGA remote control
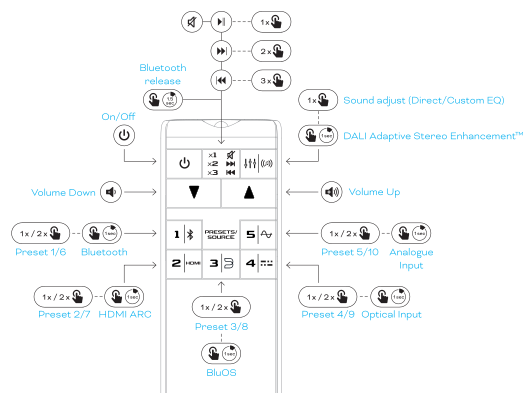
The DALI VEGA remote control duplicates the most frequently used functions of the DALI VEGA speaker.
DALI VEGA buttons and volume wheel
From left to right, the DALI VEGA buttons provide the following functions:
Standby button
Press the Standby button to wake your DALI VEGA or return it to standby.
DALI VEGA power consumption in standby mode is less than 0.5 Watts.
Mute button
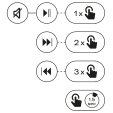
Press the Mute button to silence or restore audio. If the currently selected source offers playback controls, the Mute button will control its functions: press once for Play/Pause, twice for Skip forward, and three times for Skip backward. Press and hold the Mute button for Bluetooth release.
Preset buttons 1 to 10

The Preset buttons enable immediate selection of any stored items such as radio stations or streaming services.
A single press activates presets 1 to 5.
A double press activates presets 6 to 10.
Input button

Pressing the Input button scrolls through and selects the available DALI VEGA signal inputs in the following order:
The first press on the Input button shows the current signal source selection. Subsequent presses toggle through the sources.
Back/Exit button

Pressing the Back/Exit button steps back through the menu levels.
Volume wheel
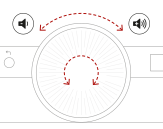
When your DALI VEGA is switched on and not in setup menu mode, the volume wheel controls volume. Turn it clockwise to increase volume and counterclockwise to decrease volume.
Remote control
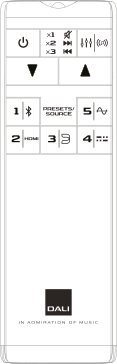
The DALI VEGA remote control duplicates the most frequently used functions of the DALI VEGA speaker.
The DALI VEGA remote control and its button functions are illustrated on page 24.
11. Bluetooth connection
Bluetooth pairing
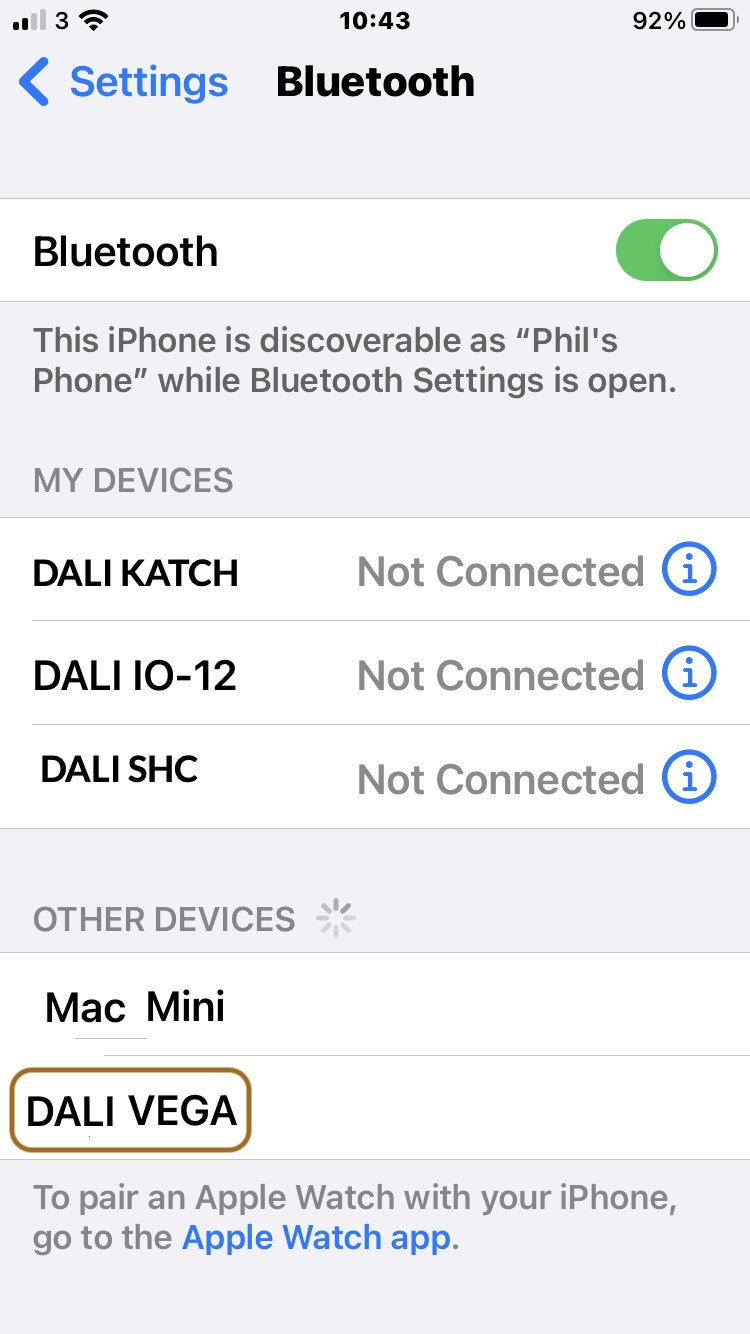
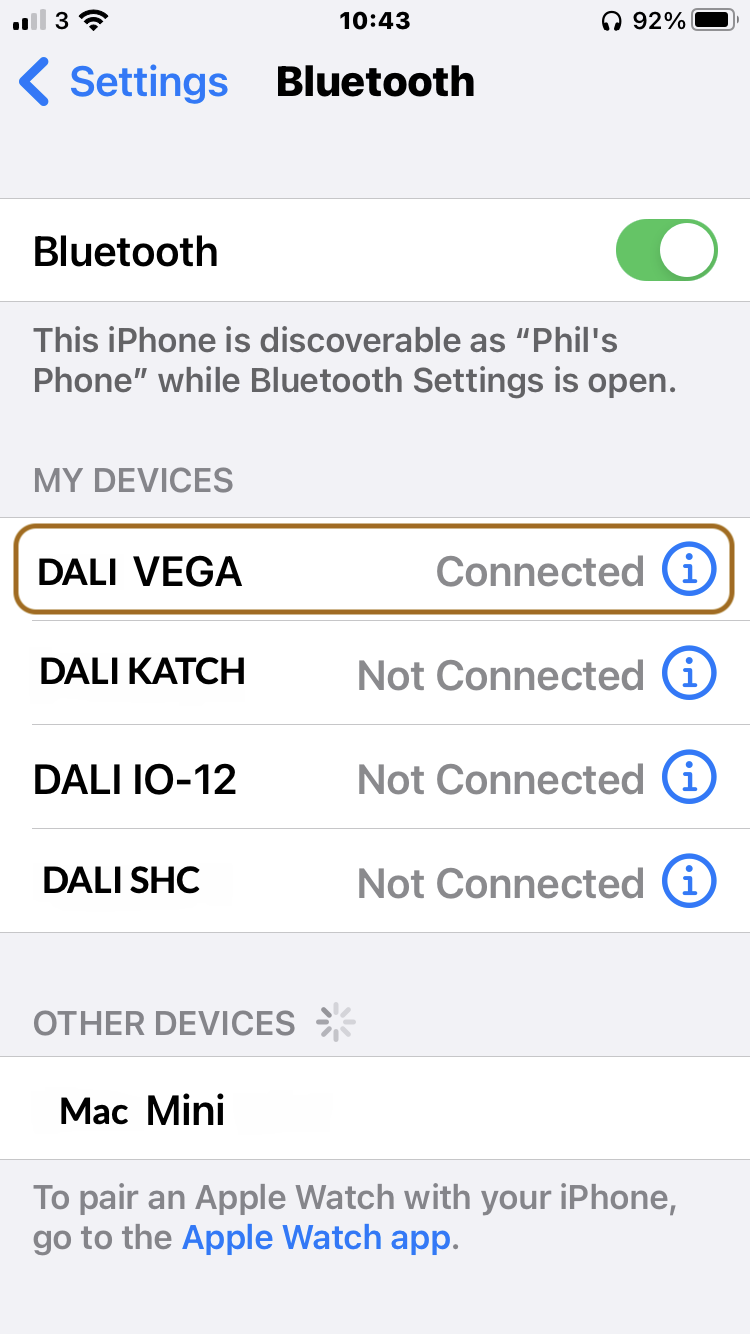
To connect your Bluetooth device to the DALI VEGA:
Turn on the DALI VEGA.
Select the Bluetooth input using the Input button.
The DALI VEGA is now ready for Bluetooth pairing.
- If the Bluetooth LED is blinking, no device is currently connected.
- If the Bluetooth LED is solid, a device is connected. To disconnect the connected device, use the Bluetooth release function.
- Only one Bluetooth device can be connected at a time.
- Initiate Bluetooth pairing on your device. When pairing is complete, music will be played back from your Bluetooth-connected device.
The DALI VEGA will automatically connect to the latest used device when Bluetooth is selected if a device has been paired to the DALI VEGA earlier, and is within range.
The DALI VEGA will not initiate auto playback. Playback has to be started from the connected device or by pressing the Mute button shortly on DALI VEGA or the remote control.
Bluetooth release
If you are unable to pair your device with the DALI VEGA:
Press and hold the Bluetooth release button (Mute button) until the Bluetooth release sound plays and the Bluetooth LED (LED 1) starts blinking.
The connected device is now released, and you can restart pairing.
Bluetooth release can also be activated by going to Input settings -> Bluetooth in the menu system.
Up to 8 Bluetooth devices can be paired with the DALI VEGA.
If you change the name of the DALI VEGA in the BluOS app, the Bluetooth name will change accordingly.
12. Care and support
Your DALI VEGA should not require any special treatment beyond the kind of care that you would give other high-value items in your home. Use a soft, dry cloth to dust off the case.
DALI does not recommend using any cleaning fluids or sprays.
13. BluOS troubleshooting
The multi-colour light indicator by the BluOS logo also indicates the BluOS status of the DALI VEGA:
| Indicator light code | Description |
|---|---|
| Solid red, then flashing green | Powering up / rebooting the unit |
| Solid green | Hotspot mode |
| Flashing green | Connecting to network |
| White pulse | Software update available |
| Solid red | Upgrade mode |
| Alternate flashing red and green | Upgrading |
| Flashing blue | Mute mode |
| Solid white | Indexing |
| Solid blue | Connected to network – ready to use with the BluOS app |
| Flashing red | Factory reset in progress |
| Solid purple | Hotspot mode timed out |
For more information, see the Bluesound support page:
14. Firmware updates
Updated firmware for your DALI VEGA may occasionally be made available via the BluOS app. Updated firmware may improve performance and reliability or introduce new features.
15. DALI VEGA specifications
- Frequency range
-
32 - 22,700 Hz, ±3 dB
- Maximum SPL @ 1 m
-
110 dB
- Crossover frequency
-
2,400 Hz
- Crossover principle
-
2-way, 8-ch active crossover
- High frequency driver(s)
-
4 × 25 mm soft dome
- High frequency diaphragm
-
Soft woven fabric
- Low/mid frequency driver(s)
-
4 × 4½-inch
- Low/mid frequency diaphragm
-
Paper and wood fibre cone
- Enclosure type
-
Tuned mass enclosure
-
2 × Rectangular passive radiators (3 × 6-inches)
- Passive radiator tuning frequency
-
32 Hz
- Amplifier type
-
Class D Bridge-Tied Load (BTL)
- Amplifier output pr. channel
-
8 × 50 W
- Total amplifier output power
-
400 W
- Connection input(s)
-
1 × HDMI ARC
-
1 × Analogue input (RCA unbalanced, stereo)
-
1 × Optical input (Toslink, stereo)
-
1 × USB Audio/Service (HDD or USB drive)
- Connection output(s)
-
Sub out
-
USB power (5V/1A)
- Sub out low pass filter
-
120 Hz
- Digital input formats
-
PCM, stereo
- Wireless input(s)
-
Bluetooth
-
BluOS
-
Spotify Connect
-
Tidal Connect
-
Apple Airplay 2
- Bluetooth input codecs
-
AAC
-
aptX
-
aptX HD
- BluOS input codecs
-
MP3
-
AAC (M4A, MP4)
-
WMA
-
OGG
-
FLAC
-
ALAC (M4A)
-
WMA-L
-
MQA
-
WAV
-
AIFF (AIF, AIFC)
-
PCM
-
DSD256 (DSD to PCM conversion)
- Supported input audio formats
-
16 - 24 bit audio
-
32 / 44.1 / 48 / 96 / 192 kHz sample rate
- Recommended placement
-
Standing: Free space
-
Standing: Near wall
-
Standing: Close to corner/wall
-
On wall: Landscape
-
On wall: Portrait
- Functions
-
Adaptive Orientation Adjustment
-
Adaptive Stereo Enhancement
-
Up to 40 programmable presets
-
Sound adjust (Direct/Custom EQ)
-
Rear wall distance
-
Bluetooth release/clear
-
HDMI audio delay
-
Optical signal/carrier detect
-
Input sense
-
LED setting
-
Factory reset
-
Stand-by (Auto Power)
-
Mute
-
Power On/Off
-
Volume
-
Source Select
- Maximum power consumption
-
250 W
- Standby power consumption
-
≤ 3 W
- Dimensions (H × W × D)
-
143 × 683 × 243 mm
-
5.63 × 26.90 × 9.57 inches
- Shipping dimensions (H × W × D)
-
330 × 870 × 200 mm
-
13.0 × 34.25 × 7.87 inches
- Weight
-
8.7 kg
-
19.18 lb
- Shipping weight
-
13.3 kg
-
29.32 lb
- Finishes
-
Dark Oak
-
Natural Oak
- Accessories included
-
1 × Remote control
-
2 × AAA batteries (for Remote control)
-
2 × Wall brackets (Wall)
-
2 × Wall brackets (VEGA)
-
2 × Screws for VEGA wall brackets
-
1 × M6 Allen key
-
1 × Cable holder
-
1 × Mains cable
-
1 × Product registration card
-
1 × Quick start guide
-
2 × Wall mounting template
-
1 × Safety manual
All technical specifications are subject to change without notice.
Legal Notices
The following terms are trademarks or registered trademarks of their respective owners:
- Bluetooth®
-
Bluetooth SIG, Inc.
- BluOS™
-
Bluesound International, a division of Lenbrook Industries Limited
- HDMI®
-
HDMI Licensing Administrator, Inc.
- Wi-Fi®
-
Wi-Fi Alliance
Technical specifications

- 330 mm

- 870 mm

- mm